Nooooooooooooooo they popped up on Ebay over here in the UK and were on there for about 19minutes and I had to have them, they were apparently originally bought from HornBlasters two years ago.
Cheers matey, thank you for your comments ![]()
It’s still along way from finishing! This is a dummy run to see how it all comes together. I am going to strip it all off next weekend to spray the chassis rails and make it a bit more presentable underneath!
Then I have to wire it all up which is going to take the longest to sort out, (it’s easy to do, but I want all the wiring hidden) and I am running seperate kill switches for each compressor and then having lights in the cab to show if they are on or not etc etc. I have worked out I need about 12 or 13 cables from the cab to the back to do what I want to do ![]()
I will keep the updates going.
Cheers!
Hey I’m about to refinish my horns and I really love the bare look. Will it hurt the horns to sand blast them?
Hey Slim, no it won’t hurt them at all, simply mask up properly & make sure you prevent any particles from going up the Bell’s or strip them down and sand em up!![]()
Welcome to the forum!
Ok, so a little cheeky update…
In preparation for doing the electrics, I decided I wanted to do something a little more different than the average hidden kill switch etc etc, so I embarked on looking for ideas and came across this on ebay.

Being as I had a lot of switches etc etc I thought it would be more fun to build my own switch panel, so armed with a few tools, I set about making a template out of an old drill box I was throwing out.
The start…

Next I cut out a section of plastic from the box…

Then I set about marking up and cutting all my holes…

I started fitting the switches…


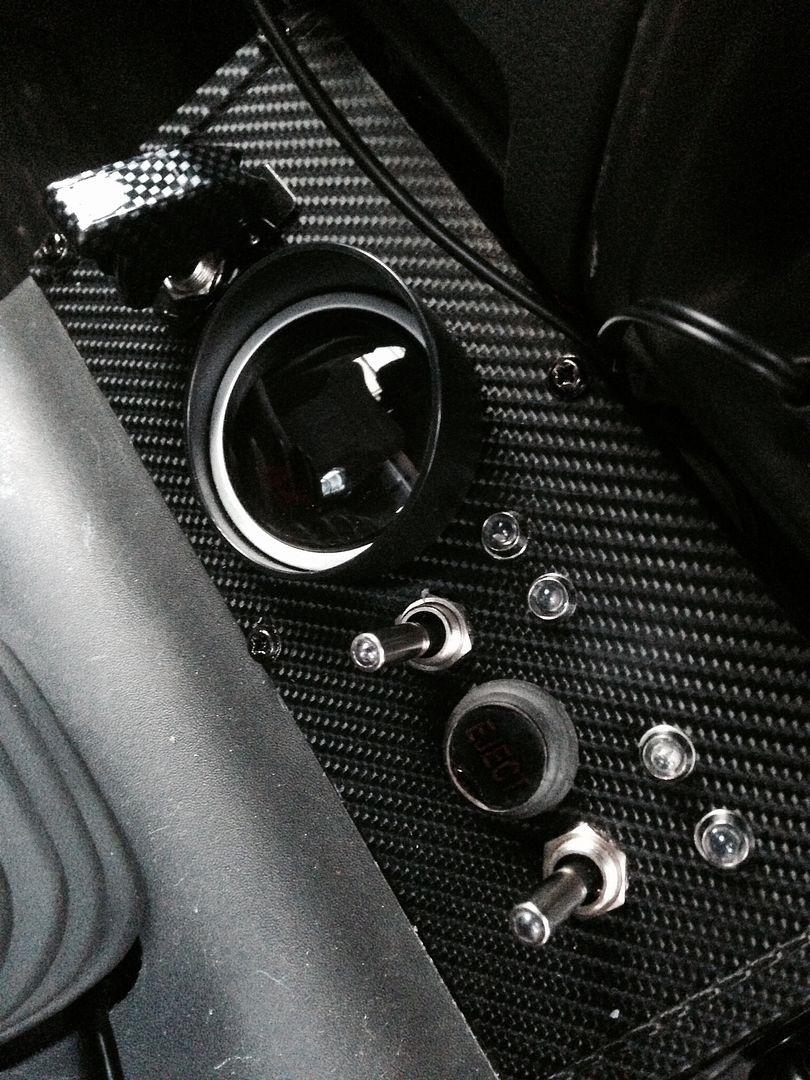
Now I fitted the Air Zenith pressure gauge and cover…


Now I just have to wait for the “Ejector Seat” illuminated push switch and some LED’s & finally, some 3D Carbon Fibre black & silver wrap that I have ordered:D
Good work there stinky
When i had my old e150 day van i made a panel pretty much the same as your making to house the switches for my grill lights/under floor lights/animal sounds horn /siren control horn + dukes of hazard horn
Made it out of dexion and sprayed it black
I like making stuff nead another project me thinks
Cheers mate;) I like making things too, all those episodes of BluePeter paid off!!
(For our friends across the pond, BluePeter is a program over here for kids, where they make things like Xmas presents and Mother’s Day presents out of empty washing up liquid bottles with toilet roll holders & sticky tape! Lol lol)
One other thing I did today was make a temp connection to the compressor and filled the tank with some air ![]()
I then have run a temp trigger switch underneath from the cab to the solenoid and this was the result…![]()
The video is so distorted with loudness and does not do them justice!:rolleyes:

Cool stuff man, details make the difference with things like this. I like the ejector seat idea too. 
I added a bit more to the switch Control panel:D
I drilled the holes for the LED’s and done away with one of the switches to make way for the EJECTOR SEAT button.

My carbon Fibre wrap turned up yesterday…

I got the hair dryer out and wrapped the panel. I was really quite impressed at how easy it was to do.

I started to cut out the holes with a sharp Knife.

I then started fitting the switches & Pressure gauge etc etc

All switches and LED holders fitted…

Last thing I need to do is have some white stickers made up for it & then it can be fitted:D
Here’s what it looks like connected up to a 9v battery to test the LED’s:D:D


And yet I am still babbling on about my control panel… Lol
This is a mock up only of the stickers I have ordered and am now waiting upon:D
I think it’s a bit busy but I probably won’t use all the stickers on it, I am going to play with them a bit first.

I love the “Ejector Seat” button…
The button will be illuminated “EJECT”![]()
Now I just have to figure out a way to launch the wife into the atmosphere when I press it!!! Ha hahahaha ![]()
I need an Eject button also.
Good point, I need one too…:rolleyes:
And now for another jaw wrenchingly boring update! 
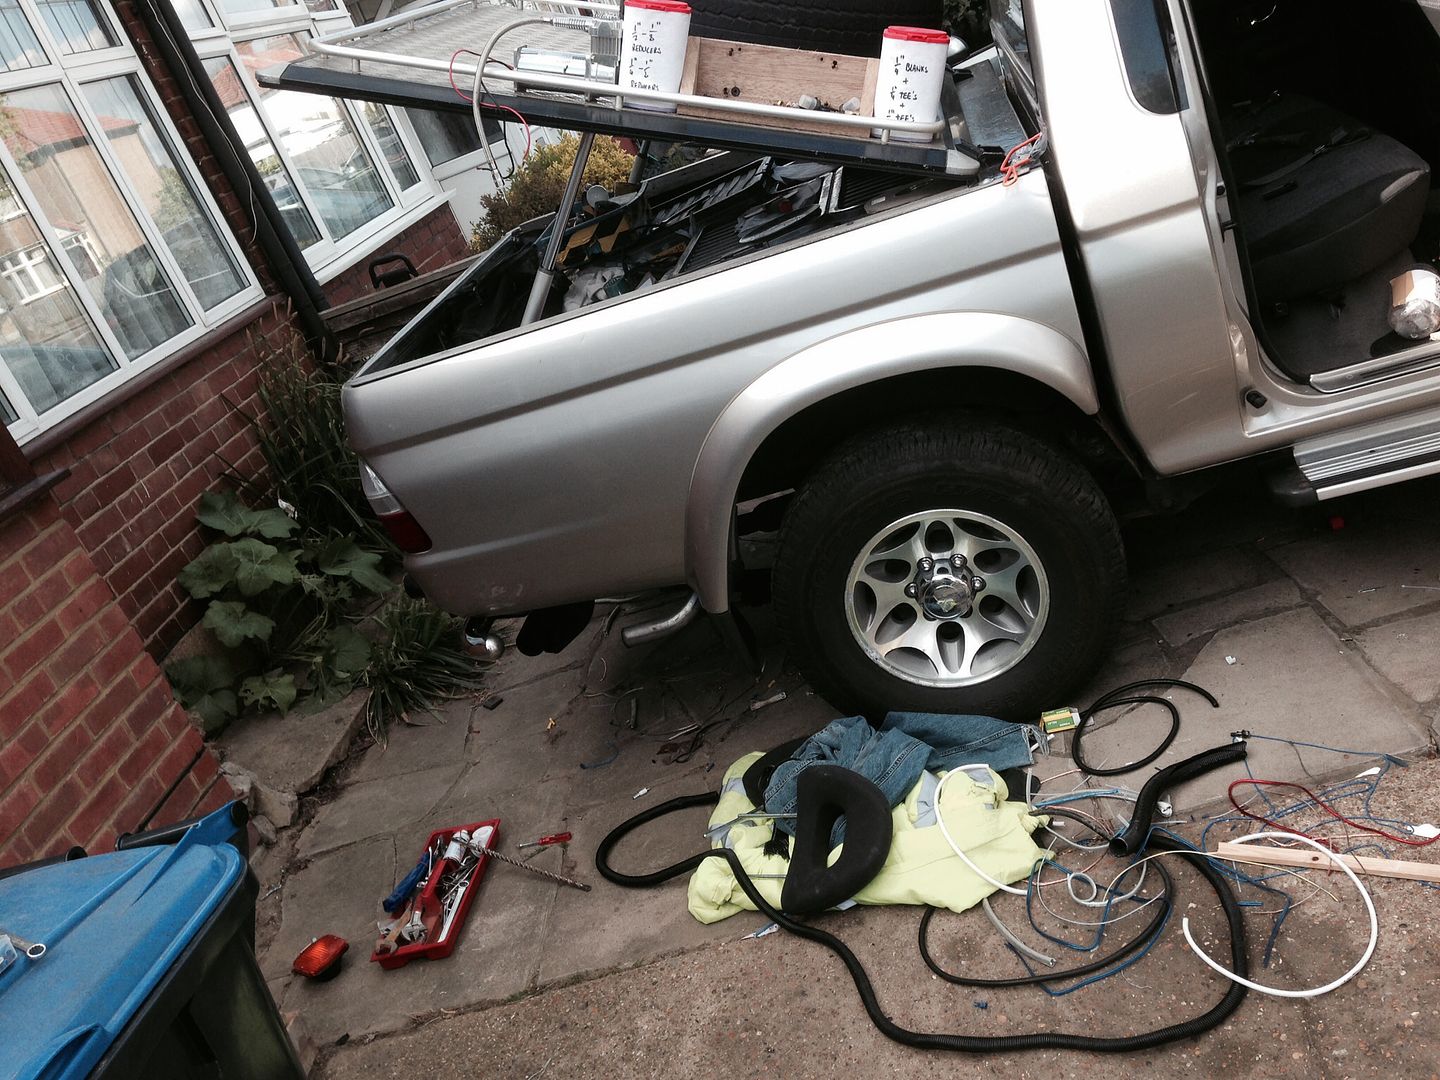
Well it’s Easter bank holiday weekend and I have been under the truck and inside pulling it apart for two days solid now!
I have run new 25mm double insulated tails from the battery to behind the rear seat. This is to supply enough power to the battery, without over heating the cables etc etc.
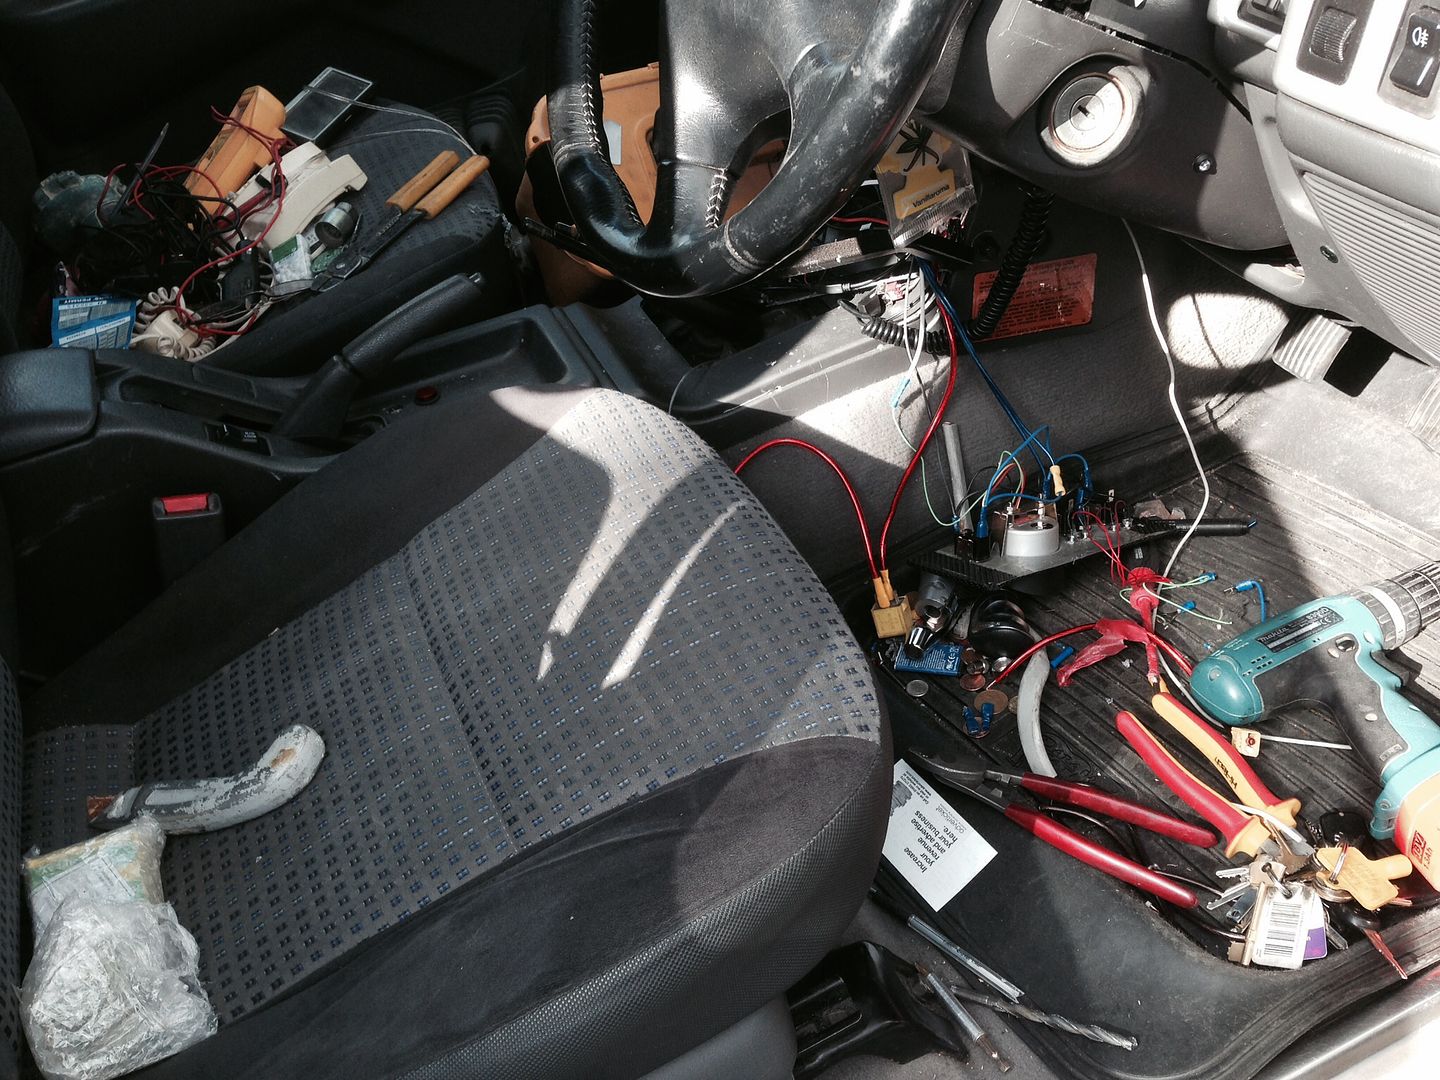
First job was to start by drilling a few holes:D


Then feed up the new cables from underneath.


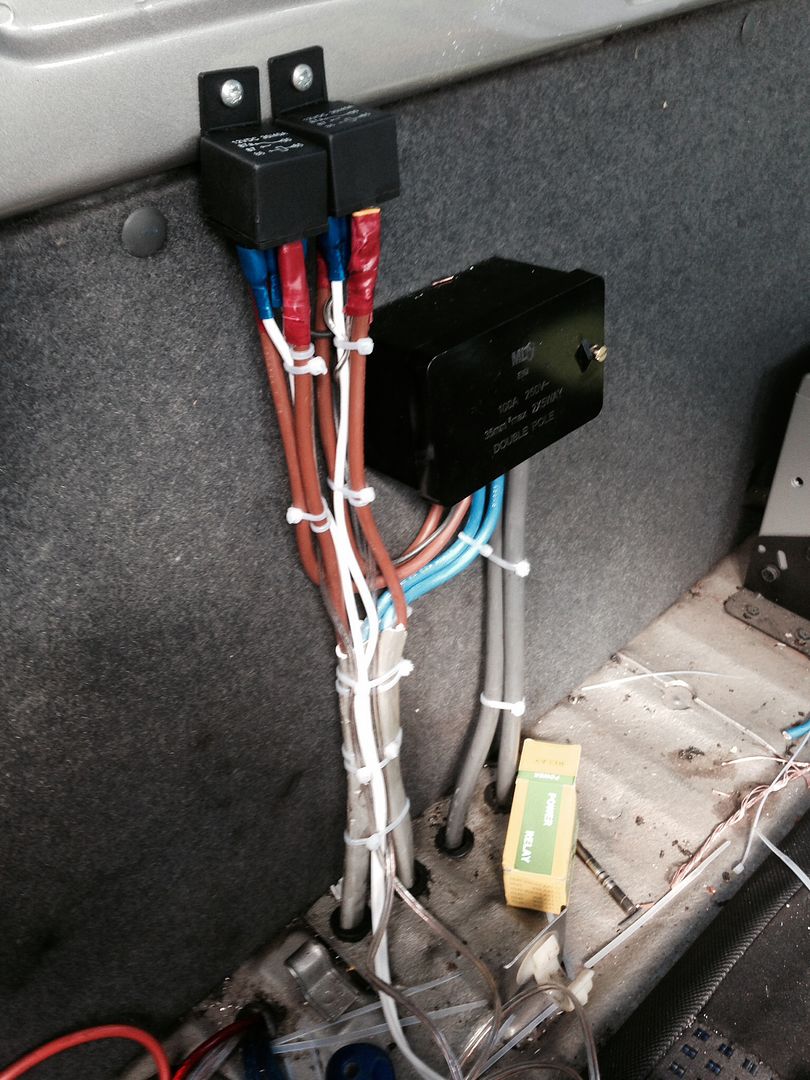
Next was to start wiring for the relays & remote control stuff blah blah…

I then fitted a nice big chunky connection box, I fed the two compressors in 10mm PVC twin & earth cable…

Next I connected up the relays, I also wired off terminal 87a a feed to the front to the switch control panel for the LED’s to show when the compressor is running.

I wanted to tidy up the wiring to the Remote control receiver I use to open the open and shut the rear cover on the bed of the truck.

I covered the wiring to make it easier on the eye

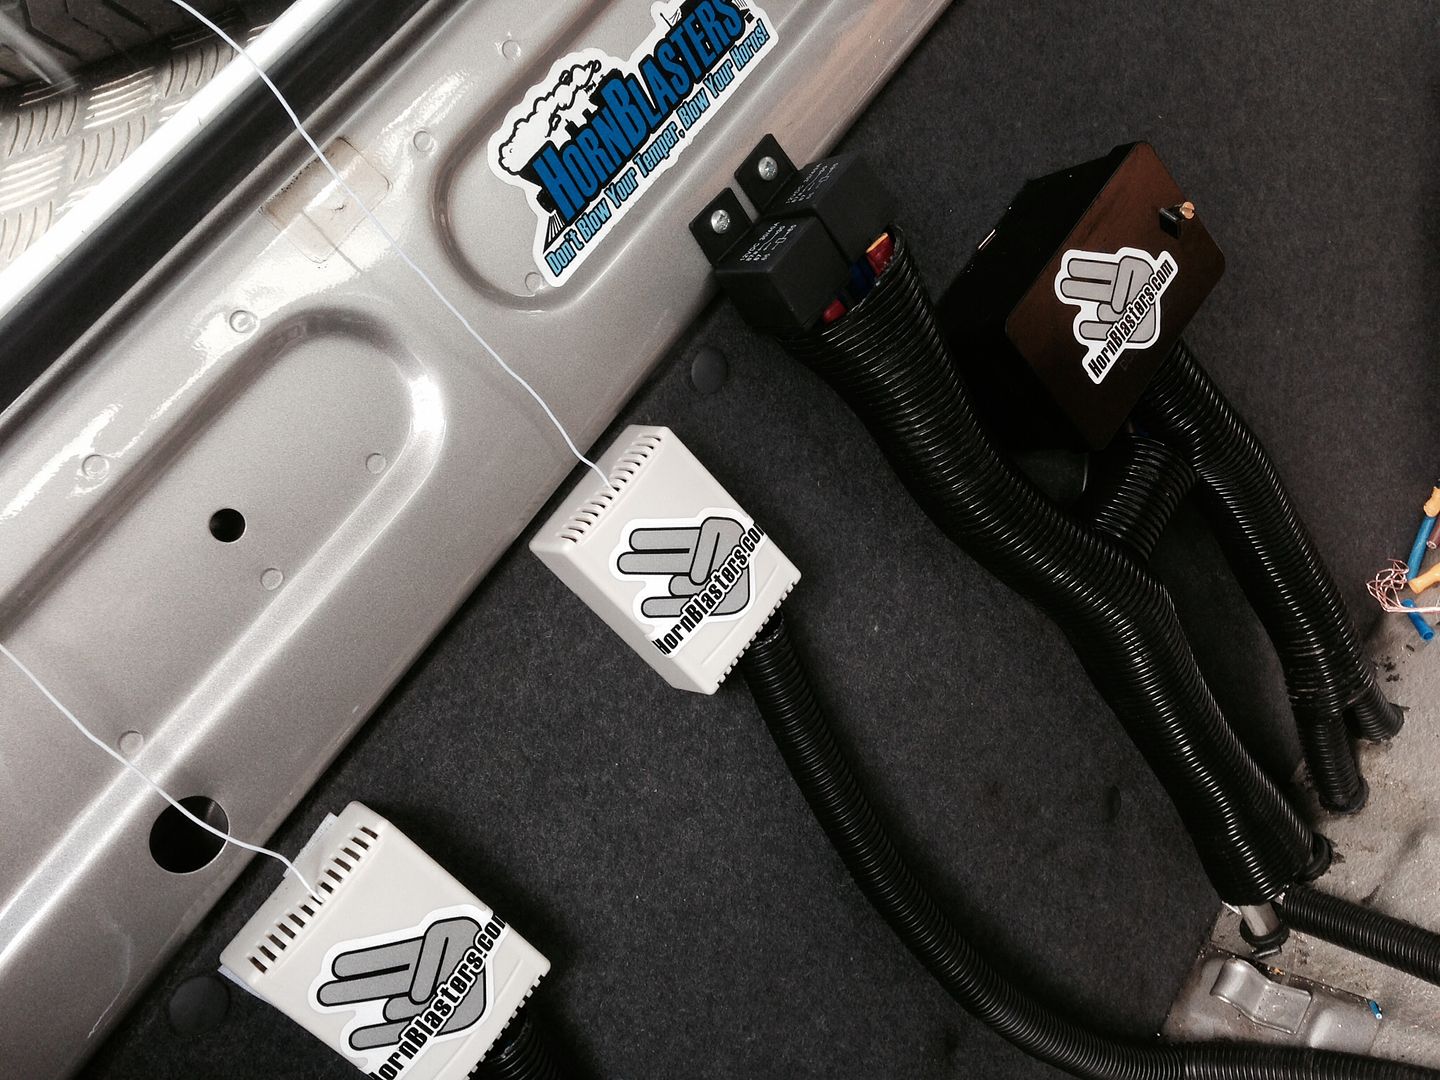
I fitted the 2nd two channel receiver which will activate the K5’s and the Shockers by remote control all wiring covered now…

A few stickers to tart it up a bit

This was the state of the truck after two days… A right mess!!!

It’s never ending!!!..:rolleyes:

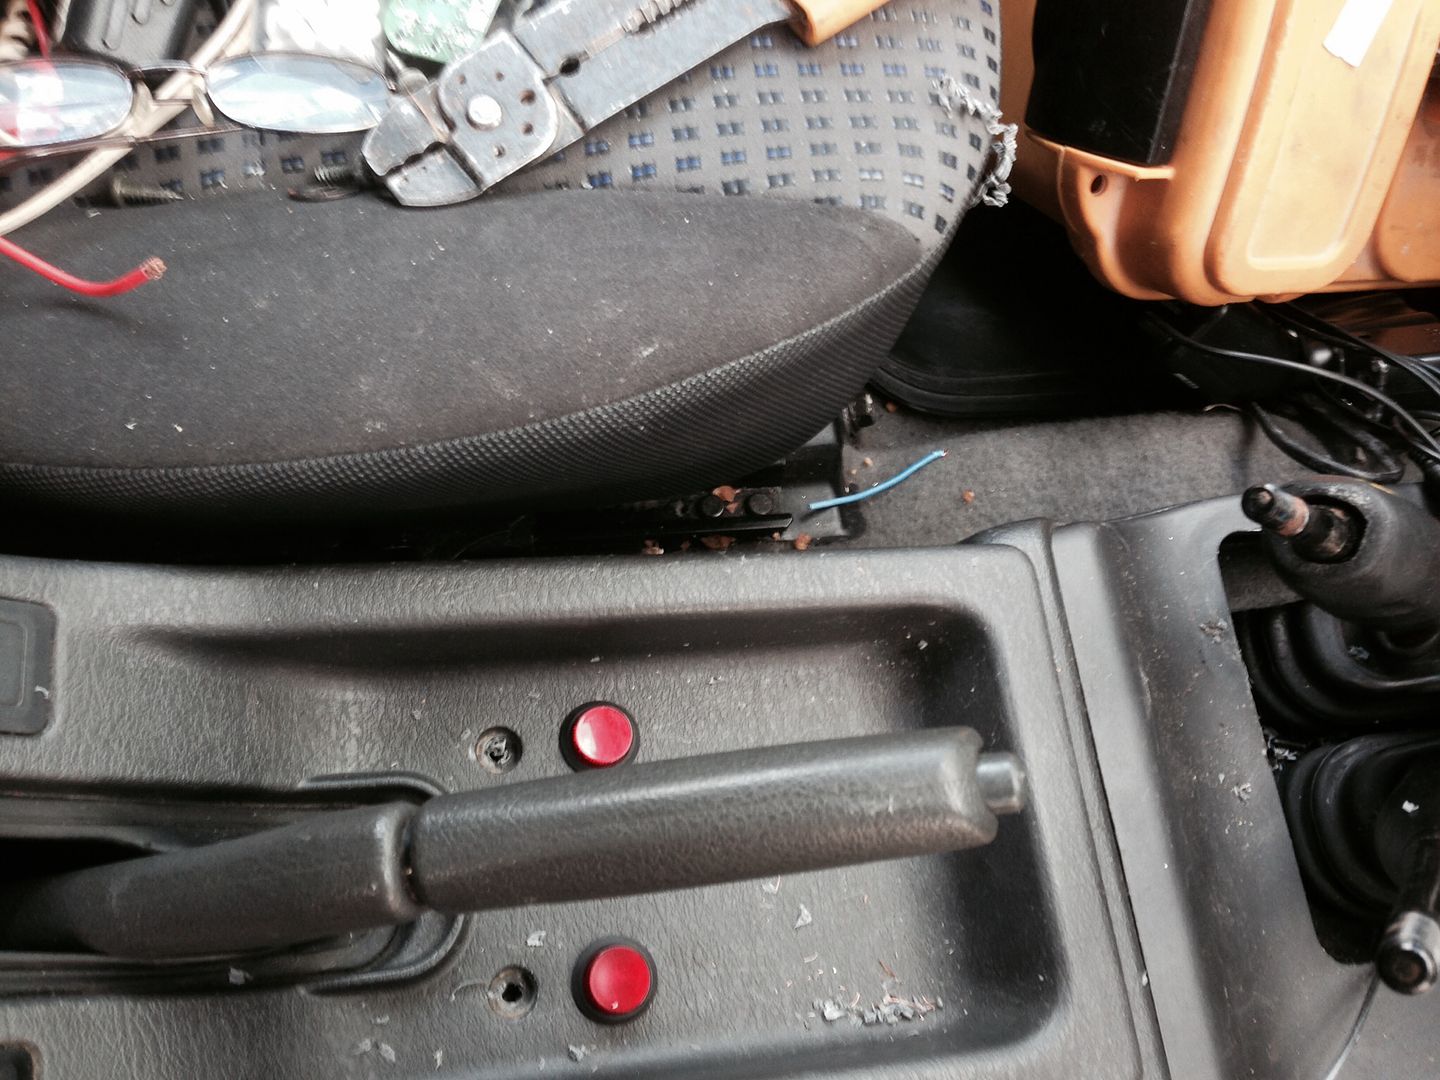
The Horns (K5’s & Shockers) are going to be activated by these two buttons or the remote control. I drilled them into the centre console.

Next I managed to carefully tuck all the wiring away and position the switch panel. You can see the two red led’s & the ejector seat button illuminated:D


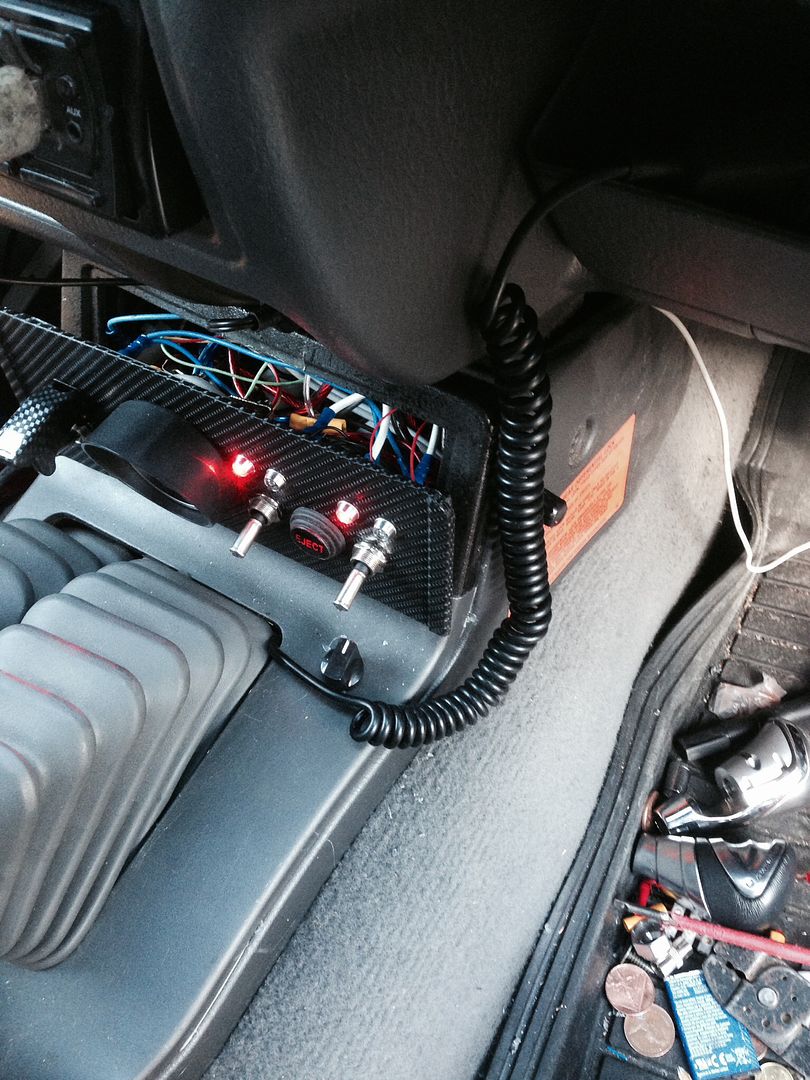
Now it’s finally time to fire up the gauges:D

The blue LED’s mean that the compressors are now running:D

We’re now at 77psi (there’s the wife’s little Smart car, captured on the front parking camera)

100 psi :D:D

At 158psi they cut out after filling the 8.5gallon tank in under 4 minutes:D

All off and now to start clearing up…

Next on the “TO DO” list is, fit the shockers. Apply the stickers on the control panel when I get them, fit a 50A fuse at the battery for the new main feed, some cable tieing underneath and finally, change the two Horn push switches for 12v LED illuminated switches (currently 240v).
Oh and last but not least, “Leak test” the tank!